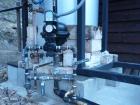
55 Gallon Steam Sterilizer
As a part of the Salt of the fungal world we want to think about cultivation methods, especially low-tech cultivation methods that make it accessible to all. One way of achieving this is taking lab tools and creating them yourself out of cheaper and easier to acquire materials. One of my favorite teachers has a term he coined “Guerrilla Alchemy” where he implements easily accessible items and turns them into lab equipment for processing materials. We can think of this as Guerrilla Mycology.
To start things off, here is a great article about creating a 55 Gallon Steam Sterilizer system using common and relatively affordable and accessible tools. This is a method of sterilizing substrate for successful cultivation practices:
Original Article by Marc R. Keith at http://mushroomvideos.com
What my lawyer made me say
Constructing your own boiler is something which is going to require mechanical aptitude and welding/brazing skills. Please don’t hurt yourself or others by trying to duplicate what you see on this page if you don’t have both. This page is presented as information only, to show how we did it. You are responsible for your own safety, so if you attempt to duplicate our system, please be very careful, don’t cut corners, and realize you’re working at your own risk.
Marc R Keith
Manual Operation 55 Gallon Drum Boiler
Scroll down or click here for the automated version
Click the thumbnails to enlarge images on this page
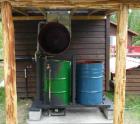
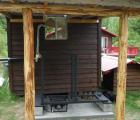
This page details construction of the 55 gallon barrel sterilizer, pictured at your left, that we are using at Mountain-Mushroom-Farm in Ferry County, Washington. Total cost for the entire system, including the propane burner and steel support frame was under $400, and it can sterilize 100 pounds of mushroom spawn or substrate at a time. I originally set up the drum sterilizer last December, when temperatures were below zero and the ground was frozen solid.
Once the weather warmed up, I dug out the ground to set concrete footings and a slab for the system to sit on. As we rebuilt the sterilizer, I took lots of pictures to document the process in hopes it would help other mom-and-pop mushroom farms find an inexpensive method of sterilizing grains and bulk substrates for growing mushrooms. Using this sterilizer and our underground colonization and fruiting area, Mountain Mushroom Farm is producing up to 70 pounds of Shiitake mushrooms daily.
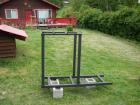
The first thing that became obvious from using this system during the winter with no foundation other than concrete blocks for the steel frame pictured to your right, was that a concrete slab and footings would have to be built when the weather warmed up. The heat from the burner melted the ice, causing the thing to constantly settle and heave as the ground repeatedly thawed and then re-froze.
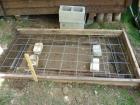
The first step in doing this correctly was to dig down 8 inches and then to insert steel mesh and rebar(in this case angle iron I had around that was left over from building the shelves in the mushroom farm fruiting room). When you live three hours from the nearest home improvement center, you use what you have!
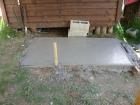
I used 2 X 4 lumber as forms on three sides, giving the concrete slab a depth of up to 12 inches, once it was all level. That may be overkill, but at least I know it’s not going to shift this winter under repeated heating and cooling cycles!
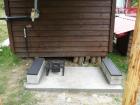
Once the concrete had cured 48 hours, I busted the forms off and then used two 8″ X 16″ concrete blocks on each side as the support structure for the bulk sterilizer frame. The concrete blocks were leveled and mortared into position, and then the voids were filled with concrete, giving a solid 8″ X 32″ concrete frame on each side. I cut steel plates to fit the top of the blocks, and then built and welded a mitered angle iron frame to each steel plate. This spreads out the load, preventing the concrete from being damaged by the frame and weight of the full 55 gallon drum boiler and sterilizer system.
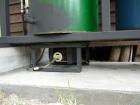
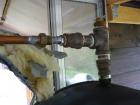
On the left, you see the completed frame sitting on the steel-jacketed footings. Above it you can see the insulated copper pipes which feed steam to the underground growing areas for heat and humidity. Once the barrels were in position, the frame was adjusted on the blocks so the existing piping would attach back to their original fittings, which were unions soldered into place to facilitate later removal. The upper pipe takes steam from the exhaust on the sterilizer barrel, to utilize ‘waste’ steam to heat the slab in the growing room. The lower fitting can take steam directly from the boiler to provide heat for the growing rooms when the sterilizer is not in operation. Gate valves feeding a copper ‘T’ determine which direction the steam flows.
On the right is our propane burner used to heat the 55 gallon barrel sterilizer. It was purchased from Fungi Perfecti (scroll half-way down the page) and produces up to 160,000 BTU. The steel frame above holds the weight, so the burner is free to be slid on the concrete from one end of the slab to the other, allowing it to heat the boiler when steam is required, or to heat the second barrel, which is used for pasteurizing straw. The legs on the propane burner were too long to fit under the support system, so I cut 2″ off each leg before welding them back on.
The Boiler
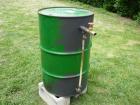
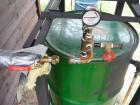
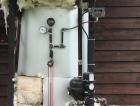
On the right is the 55 gallon barrel, modified to use as a low pressure steam boiler. As you can see, I welded two black iron pipe nipples to the barrel, to be used for filling and also for the sight glass. Attached to the one at the bottom is a 90 degree fitting, and a ‘T’ is attached to the top. The next time I take it apart, the fitting at the bottom is going to be changed out to a ‘T’ also, to facilitate easier draining. Plastic tubing is used as a sight glass so I can see the water level at all times. The hose fitting and valve at the top allow the system to be filled with water, even when steam is being produced. Since I only operate the system at 2 psi, my well easily delivers enough pressure to overcome the steam pressure and fill the boiler during operation, allowing it to run 24/7 during the coldest part of the winter months.
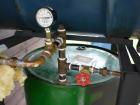
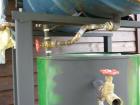
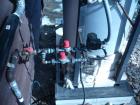
These pictures show the steam piping system from the boiler. The insulated pipe at left goes to the underground mushroom farm for heating. When the gate valve is closed, steam heat to the mushroom farm passes through the valve on the right, travels through the sterilizer barrel when it’s in operation, and then the sterilizer exhaust is connected through another valve to supply heat. To your lower right is the piping to the sterilizer.
In the picture above and to the right, you’ll see a plug at the top of the steam manifold. This is where the 5 psi relief valve attaches, not yet installed at the time these pictures were taken during assembly. For safety sake, never run a boiler without a relief valve, even if you’re standing by to babysit. It’s just too dangerous.
The 55 Gallon Barrel Sterilizer
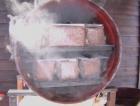
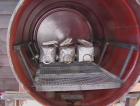
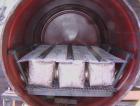
Our 55 gallon barrel sterilizer holds 100 pounds of mushroom substrate per cycle. We load 5 to 7 pounds of supplemented sawdust or rye berries into filter patch autoclavable bags for sterilization, as seen above left. The unit easily holds 20 bags without overcrowding. We place mason jar lid rings between each bag to keep them separate and allow steam to completely surround each substrate bag during sterilization.
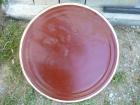
To provide a good seal, wax paper is stuffed into the groove on the lid, as can be seen upper right. This provides an excellent gasket once the ring is tightened down on the barrel. About every ten cycles, the top layer of wax paper begins to wear out, tearing when the lid is removed. It only takes a few minutes to stuff a new layer of wax paper into the groove and it’s ready for the next several cycles.
55 Gallon Drum Sterilizer Fittings
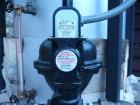
On the bottom-front of the sterilizer I welded a ‘street L’, which is a 90 degree iron fitting with male threads on one end and female on the other. This is the feed from the boiler. Steam enters here, passing through the barrel and substrates, and then exits through a fitting welded to the upper rear of the barrel as shown on the right.
When the spin valve on top is open, steam vents to the outside air. This is used at the start-up of each cycle to purge air from the unit to ensure it’s full of pure steam. Once all the air is purged, this valve is usually closed and the gate valve is opened, allowing the ‘waste steam’ to flow to the mushroom farm slab, providing essentially free heat. If no heat is required in the underground grow areas, such as during summer, this small valve is left slightly open to provide a constant flow of steam over the substrates.
Controlling the steam
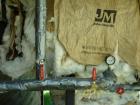
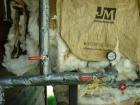
When we’re sterilizing substrates and require heat in the underground mushroom farm growing room, the valves are positioned as shown on the left. Steam travels from the boiler to the sterilizer, passes through the sterilizer, and then down through the open gate valve and out to the mushroom farm. When we’re not sterilizing substrates and need heat, the valves are positioned as shown in the picture on the right. The valve to the sterilizer(with the round handle) is closed, and the gate valve leading from the sterilizer exhaust is closed. The gate valve from the boiler to the ‘T’ fitting leading to the mushroom farm is open, thus that’s the path steam takes.
Admittedly, the insulation on the sterilizer is getting pretty ratty looking, but I don’t want to make it permanent with a steel jacket for the reason that after every cycle, I unwrap it to allow for cooling. If I left the insulation in place after sterilizing, the substrates would still be hot two days later. Since we sterilize a full load every day, I have to wrap and unwrap the insulation daily. These bats have been in use for over six months now, and while the paper backing is wearing out, they still perform like new. Obviously, they have to be kept well away from the flame source since the paper will ignite.
Shelving in the 55 Gallon Barrel Sterilizer
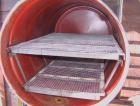
The shelves for the bulk mushroom substrate sterilizer sit in the 55 gallon barrel by gravity. The bottom shelf simply slides in the sterilizer barrel, and the top shelf sits on the frame welded to the bottom one.
The bottom shelf is always loaded first, and then a piece of hardware cloth followed by three lengths of angle iron are placed over the folded up bags to keep them closed during sterilization.
A tyvek sleeve is placed into each bag before folding as shown in the Sawdust-Woodchips video clip.
The tyvek sleeve allows the bag to expand and expel air during sterilization, but prevents the bag from drawing in contaminants from the air as it cools. Once the bottom shelf is loaded and weighted, the top shelf simply slides in on top of it and is loaded,
with another sheet of hardware cloth and three lengths of angle iron placed on it, before the lid is attached and steam is introduced.
Once all the air has been purged out of the sterilizer, the valves are closed or reduced in opening and pressure is allowed to climb to 2 psi, which is only slightly above ambient. I maintain the correct steam pressure by adjusting the regulating valve on the propane burner. This unit has provided our farm with 100% success, whether we use it for supplemented sawdust or grains. I always keep it at 2 psi for a full 8 hours before shutting off the steam supply and removing the insulation from the sterilizer for a slow cool down. Feel free to Contact-Us with any questions you may have.
Fully Automated 55 Gallon Drum Boiler
This section takes off where the manually operated system described above ends. We used the original manually operated boiler for over a year as we brought our mushroom farm up to full production. The winter of 2010-2011 convinced me that I had to come up with a different approach. We regularly get down to -30F in the winter here, and trying to stretch a water hose from the faucet on our cabin out to the boiler twice a day to fill it, proved so tiring that we almost gave up and quit. Here’s why: Our boiler is not just for sterilizing substrates, but also is used to heat the incoming air to our mushroom farm. Since a mushroom farm needs a 24/7 fresh air supply, even a short time pumping -30F air into the underground growing areas would be a disaster, and would wipe out everything within. If you put ice cold water too fast into a boiler at pressure, it will cause what’s known as shock cooling and be destroyed. Steam expands up to 1000 times the size of the water it came from. Therefore, if you simply run a cold water hose to your pressurized boiler and open it up, the steam will instantly turn back to water, causing a vacuum to develop in the boiler itself. Picture your 55 gallon barrel boiler as a beer or soda pop can that you squeeze in your hands-it’s not a pretty sight.
What the above means is that when your boiler under pressure requires filling, you must feed the water VERY SLOWLY so that you never lose pressure. Anyone who thinks this isn’t a challenge to accomplish with a water hose laying on top of the snow in -30F or even +10F temperature, simply hasn’t ever done it. If the water is running slowly enough not to shock cool the boiler, the hose freezes within minutes. If you have the water flowing enough not to freeze in the hose, you shock cool the boiler. . .There is no middle ground. We had three hoses, and had to keep two in our heated cabin, while the third was filling the boiler. Every ten minutes or so, we had to run out and get the frozen hose, bring it inside, and take one of the thawed hoses outdoors to connect. This Keystone Cops routine went on for three to four hours per day. We had to turn the burner up as high as it would go when filling, so we could maintain pressure. However, when the hose would freeze and water would stop flowing, it only took a minute or two for the pressure to reach dangerous levels. This constant stress, day in and day out, literally drove my wife and I bat-shit crazy while we waited for Spring to arrive so I could automate the system. How I designed the automated version follows.
Water Feed Valve
Our boiler water feed valve is manufactured by McDonnell Miller and the one chosen for this job is the model 247-2, purchased from BoilerSupplies.com. We chose the 247-2 version because it has a built in low water cutoff switch which is wired in series with our pressure switch. This ensures that if for any reason the water supply fails, the burner will shut down, preventing an overpressure condition.
This type of water feed valve was chosen because it feeds incrementally. This means if the water is only slightly below the set point, water will feed very slowly, preventing shock cooling. This is far superior to feed valve solenoids operated by capacitance sensors which will feed at full flow until the upper sensor is reached. Such a system would destroy a boiler like ours by shock cooling.
Water Feed Valve Plumbing Connections
I recommend using the plumbing connections shown in the image to the right, which was piped using the diagram provided by McDonnell Miller with the model 247-2 feed valve. I used more expensive, but high quality US made stainless steel valves because I was sick and tired of constantly replacing the made in china crap they force down our throats at hardware and big-box home improvement stores, which aren’t worth the cost of a boat anchor they’re much better suited for. Every week, I had a leaking ball valve which had to be replaced. I’ve yet to replace one of my more expensive, but high quality valves, making them much more economical, even in the short run.
The system you see above has water entering at the bottom-right. A water faucet was installed for convenience, but otherwise not necessary to the boiler operation. The water travels up to and then through the 247-2 water feed valve, where it then passes through a second isolation valve before entering the boiler at the bottom-left. A bypass valve when open, allows water to flow directly to the boiler should the McDonnell Miller 247-2 fail. Note the strategic positioning of the valves and unions, which allow for easy troubleshooting, isolation, and dis-assembly of the components should anything fail.
Boiler Electrical
The electrical system for the 55 gallon barrel steam boiler is simple and easy to understand, so not much space will be devoted to it. The diagram to your left assumes a U.S. based 120 volt system, but if you’re using a 240 volt system, nothing changes except that L2 isn’t a grounded conductor(neutral). The only other changes are that your solenoid coil would need to be appropriate to the voltage supplied, as will the alarm bell. Nothing else would be different.
Our system is connected exactly as shown. An extra margin of safety could be achieved by adding a manual-reset, normally open gas solenoid to the high limit circuit. By normally open, I’m referring to the solenoid itself. A solenoid such as this would allow gas flow to your control solenoid all the time unless it receives current from the normally-open contacts(close-on-rise) on the high limit Mercoid AP-153-33 controller. In this case, the burner would shut down on a high pressure condition, and would remain off until you manually reset the valve and re-light the boiler. I didn’t install such a system on my boiler because we’re always here when the boiler is in operation, so we’re able to listen for the alarm bell.
Boiler Gas Piping System
On the left you will see the process diagram of our gas/propane piping system, and on the right is a photograph of how it looks in real life as installed on our homebuilt 55 gallon drum steam boiler. Note the unions on either side of the devices, which make for easy removal for repair or replacement. The flex-hose you see heading down from the T fitting is what supplies the propane burner. The diagram and photograph are self-explanatory and need not be elaborated on here.
Hopefully, you’ve found this page helpful. Please understand we’re not selling anything here, but only have this page up to help those of you who are trying to figure out how to build your own boiler, or perhaps you found this page on a search engine while troubleshooting a problem with your existing system. Either way, we’d really appreciate a small donation to help cover our costs of running the site and paying for the server bandwidth. Even $5 to $10 would go a long way towards covering our costs of making this all so easy for you. Thanks in advance!
Original Link: http://www.mushroomvideos.com/55-Gallon-Drum-Sterilizer
